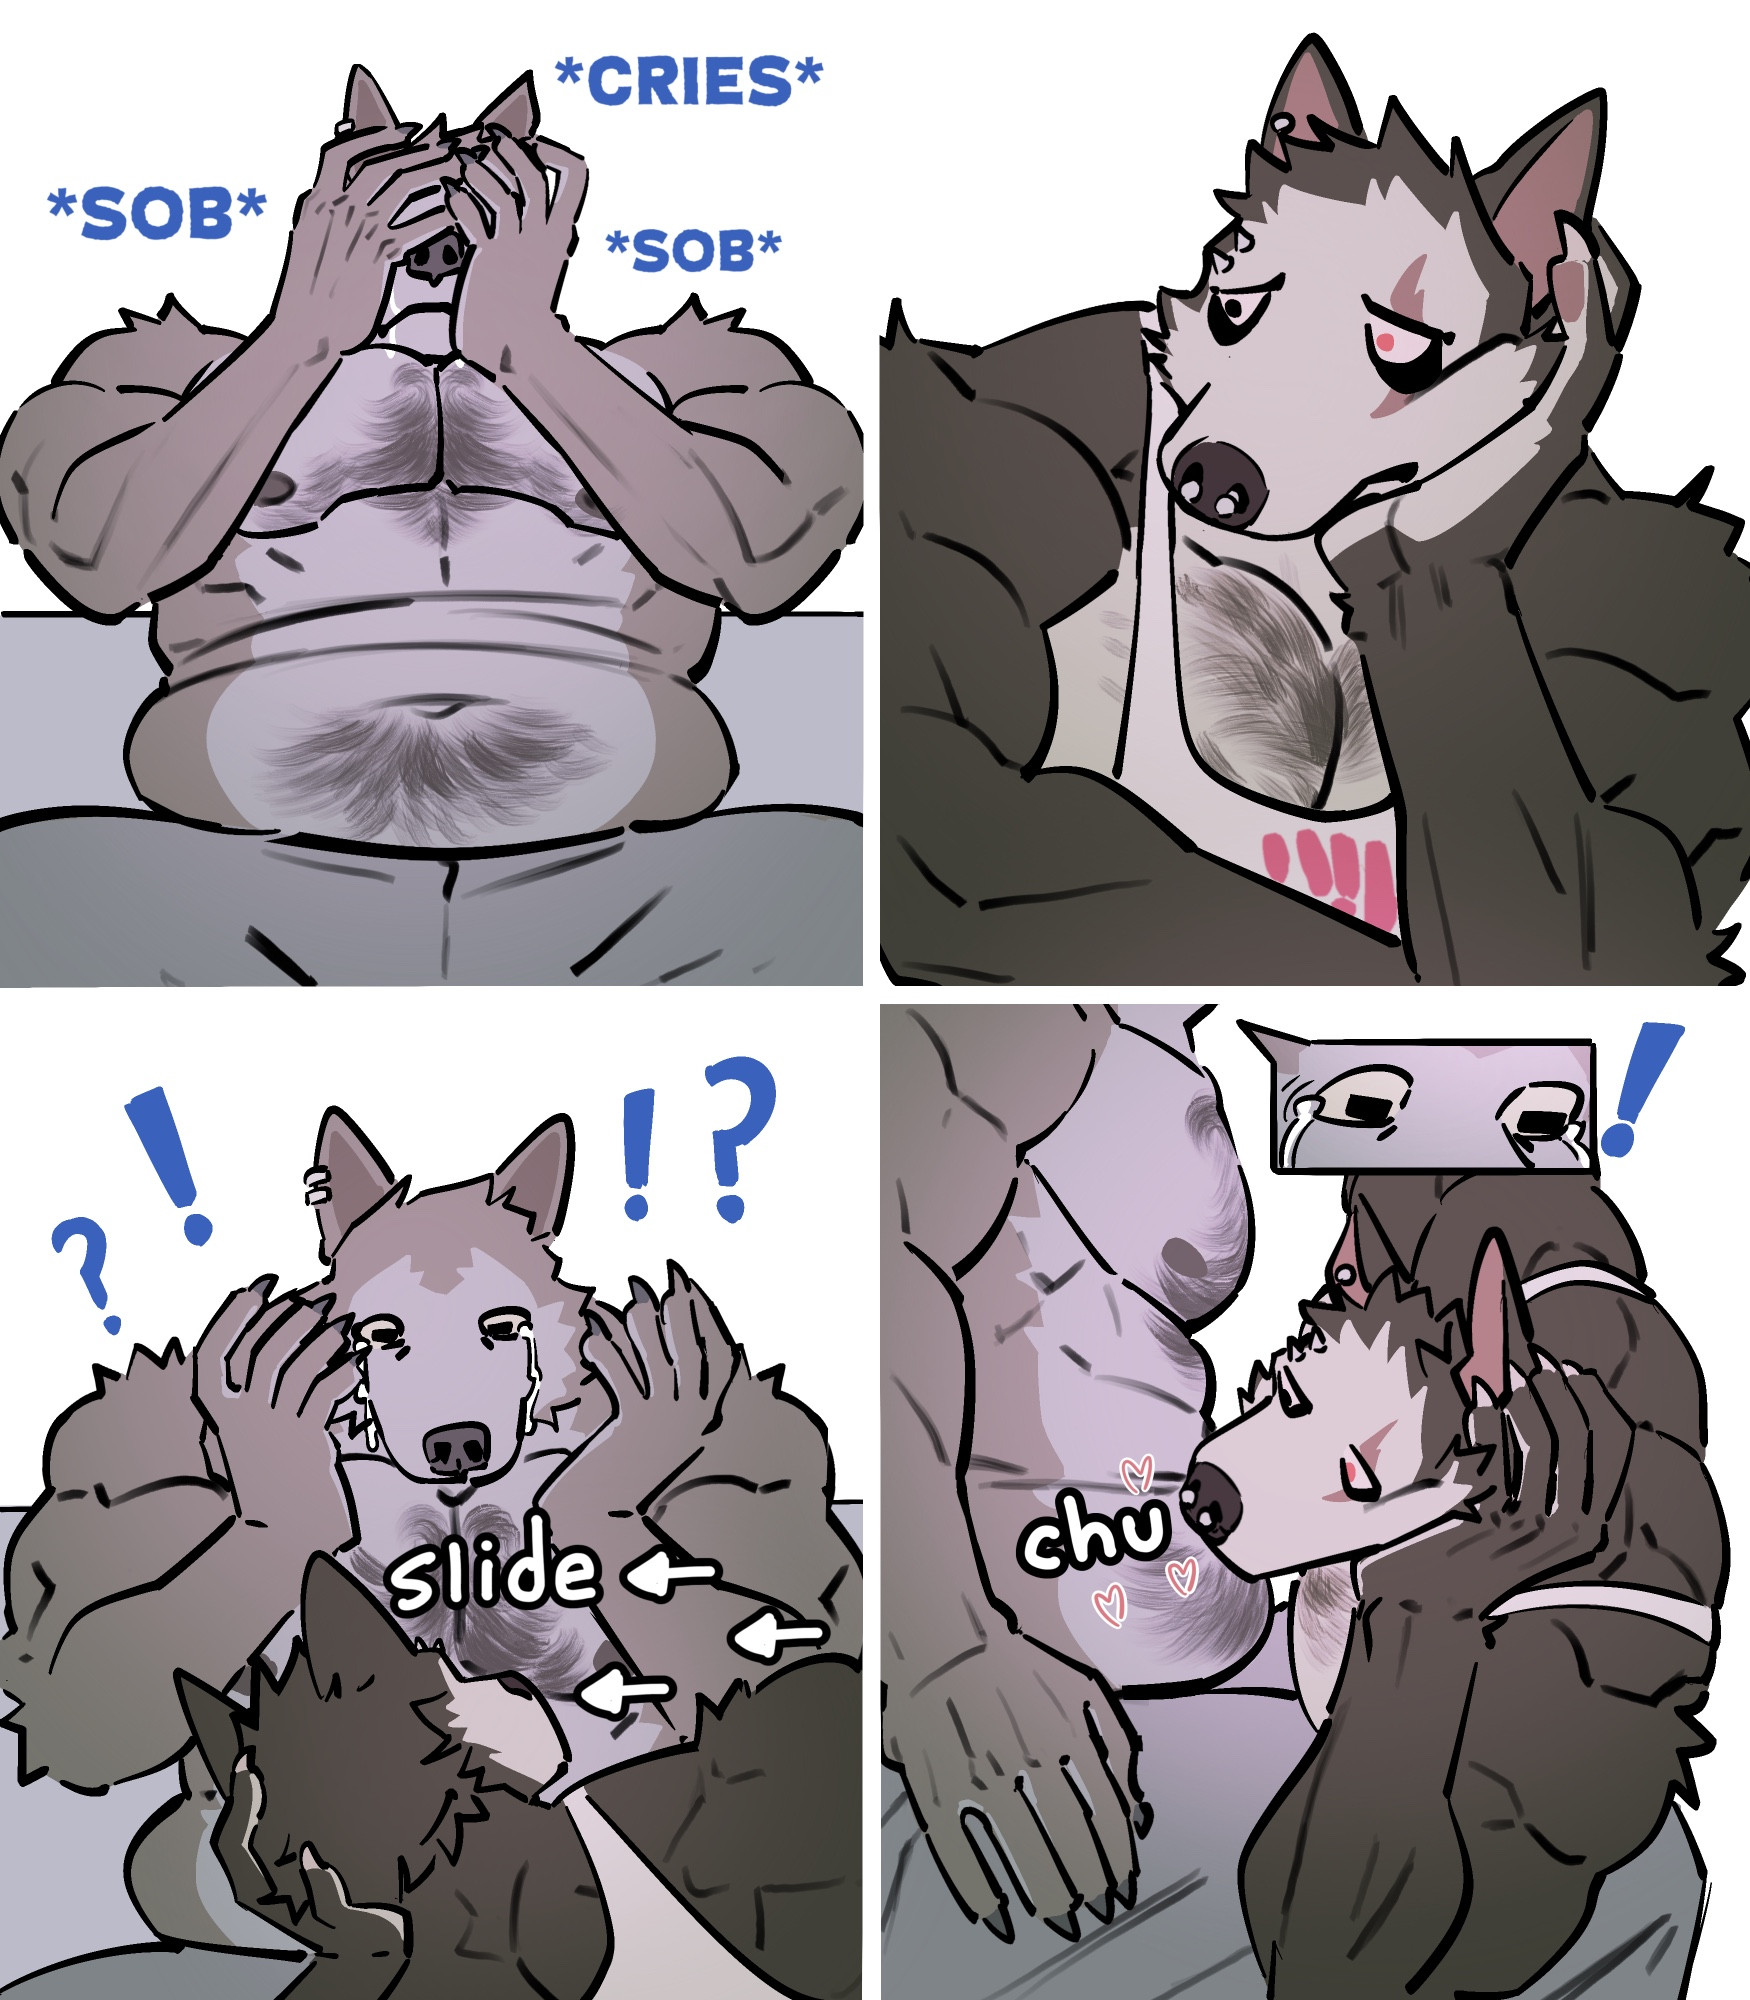
As a personal trainer what I always say to my customers is that bodies change during life and ,unless of very very dramatic events, we can shape the body like if it was made of clay.
But the first step to reach our goal is loving ourselves as we are.


Comments
Unsure of the relationship tbh
I ment bro as in close friends to be clear lol
and he's totally right,he looks very cute with that belly
But the first step to reach our goal is loving ourselves as we are.
This is a very positive piece ^^
I like it 👑
SO CUTE!!!